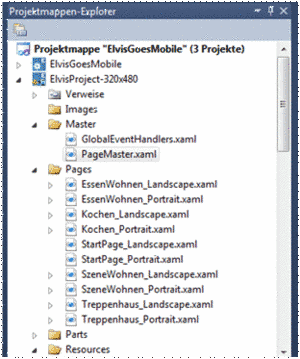
Then we already create all the pages to be used. We add the pages by right-clicking on the “Pages” folder and selecting “Add”->”Add Page” from the context menu. Name the pages according to your ideas or follow our example, we will create one page each for eating, living, cooking and staircase:
We specify the names in the same way and, for example, from “Cooking.xaml” in the dialog, the operating pages for portrait and landscape format, “Kochen_Portrait.xaml” and “Kochen_Landscape.xaml” are created.
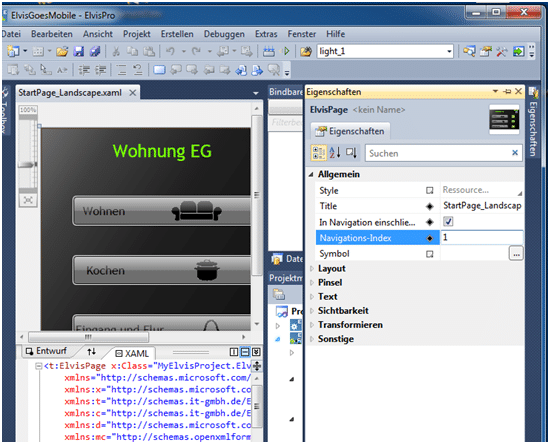
At the same time, we assign the navigation index, which determines the order in which the pages are controlled by swiping. This has to be done for every page and every alignment. The index is taken into account in ascending order when swiping over the device. The Navigation Index property can be found when you open a page in the properties of the “ElvisPage”.
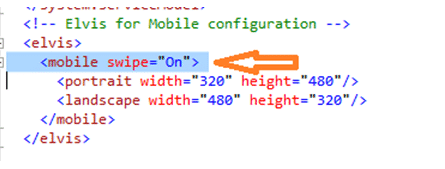
In order to activate or deactivate the swipe function for the mobile project, it is necessary to adjust the “mobile” tag in the “ElvisMobile.config” file:
If you don’t want to use the screen in its entirety, add the following attibut to at least one of the two files “PageMaster_Landscape.xaml” or “PageMaster_Portrait.xaml” of the mobile project within the “… Window” tags:
<t:ElvisMainWindow … WindowState=”Minimized” … >
(Standard: < WindowState=”Maximized”>)!
Now let’s edit the control pages of the project:
We set up the navigation on the start page. Here we create an overview of the rooms and already store the page change buttons for our project pages, which we drag and drop into our page. We then configure the pages as we want the display for our customer and connect the controls with the associated data points. For an overview of the controls supported by Elvis Viewer, see the Elvis Designer Help. The visual design options are so diverse that we limit ourselves here to functionality and not to the design for a project.


